

The application and move-in process for a rental property includes several essential steps. A move-in inspection is just one of the steps, but it is crucial for both landlords and tenants. Documenting the property’s condition upon move-in creates a baseline to compare with the move out inspection. Determining what is damage and normal wear and tear decides how much the security deposit can be withheld, if any. So, with that in mind, below, we walk you through the steps leading up to move in and why a move-in inspection checklist is critical for rental properties.
Applicants Are Approved, Now What?
Marketing, showings, collecting applications, and tenant screening is a lot of work, but the work does not end there. Follow along with the steps below for a smooth move-in process!
- Congratulations, you are Approved!
- Lease Signing and Collecting Funds
- Setting Up Utilities and Insurance
- Move-in Inspection Day
- Friendly Follow Up
Congratulations, you are Approved!
Once you have screened and selected the right tenant for your rental, notify them of the good news they are approved. If you give them a call, follow up by email to notify them of the next steps in the process. It is good to keep a quick one-page attachment or standard email template that outlines the requirements for deposits, utilities, insurance, and the lease signing. That way, they know exactly what is expected of them without relying on remembering everything discussed in your phone call.

Lease Signing and Collecting Funds
The next step is to prepare the lease for signing and collect funds. If it is within 7 to 10 business days of the move in, we suggest collecting certified funds to guarantee payment. Go over each section of the lease with your tenants and answer any questions they may have. Additionally, it is a good idea to have the tenant initial each page of the lease to acknowledge its contents. Also, be sure to include any compliance requirements, such as a lead paint disclosure.
Helpful Tip: Need advice on creating a legally binding lease? Check out our blog.
Setting Up Utilities and Insurance
With signed lease and deposit in hand, instruct the tenant to prepare utility connections and obtain proof of renter’s insurance. Not every landlord requires insurance; however, it is in both parties’ best interest and is relatively inexpensive. If utilities are not included in the rental rate, verify at least 24 hours before the move in that the tenant has set up utilities in their name. Ask incoming tenants to send over their confirmation via email; this will make verifying with the company much more efficient. If, for some reason, this cannot be verified, do not hand over keys!

Move-in Inspection Day
Welcome to move-in day! Ensure all funds (deposit and first month’s rent) are present or were submitted online if you have the capability. Next comes the critical step of completing the move-in inspection. This is a detailed walk-through that you can complete with the tenant or have them do on their own. Either way, this must include a detailed checklist accompanied by photos highlighting any areas of concern and general condition. Finally, once the inspection is complete, it should be signed by both the tenants and the landlord or property manager.
Friendly Follow Up
About a week after move-in, check back in with your new tenants. This is a great time to address any questions or concerns that may have come up during their moving process. If you have not yet received the move-in inspection report from the tenant, remind them of the importance of returning that as soon as possible. Giving tenants a call or sending out an email is a simple way to provide great customer service. Additionally, this may help you to address any minor concerns for residents before they escalate.
Why is a Move-in Inspection Checklist Important?
A move-in inspection checklist is a fillable form completed by the tenant immediately upon moving into a rental property. Why is a move-in checklist absolutely vital? The answer is a little different, but equally important, for both landlords and tenants. For landlords, a move-in checklist offers a comparison to the end of the lease condition of the property. Thus, helping the landlord decide what is considered damage and normal wear and tear before disbursing the tenant’s security deposit.
That said, from the renter’s point of view, an inspection protects from being held responsible for the damage they did not cause. Although reasons are different, a thorough move-in inspection protects both parties.

What Does a Move-in Inspection Include?
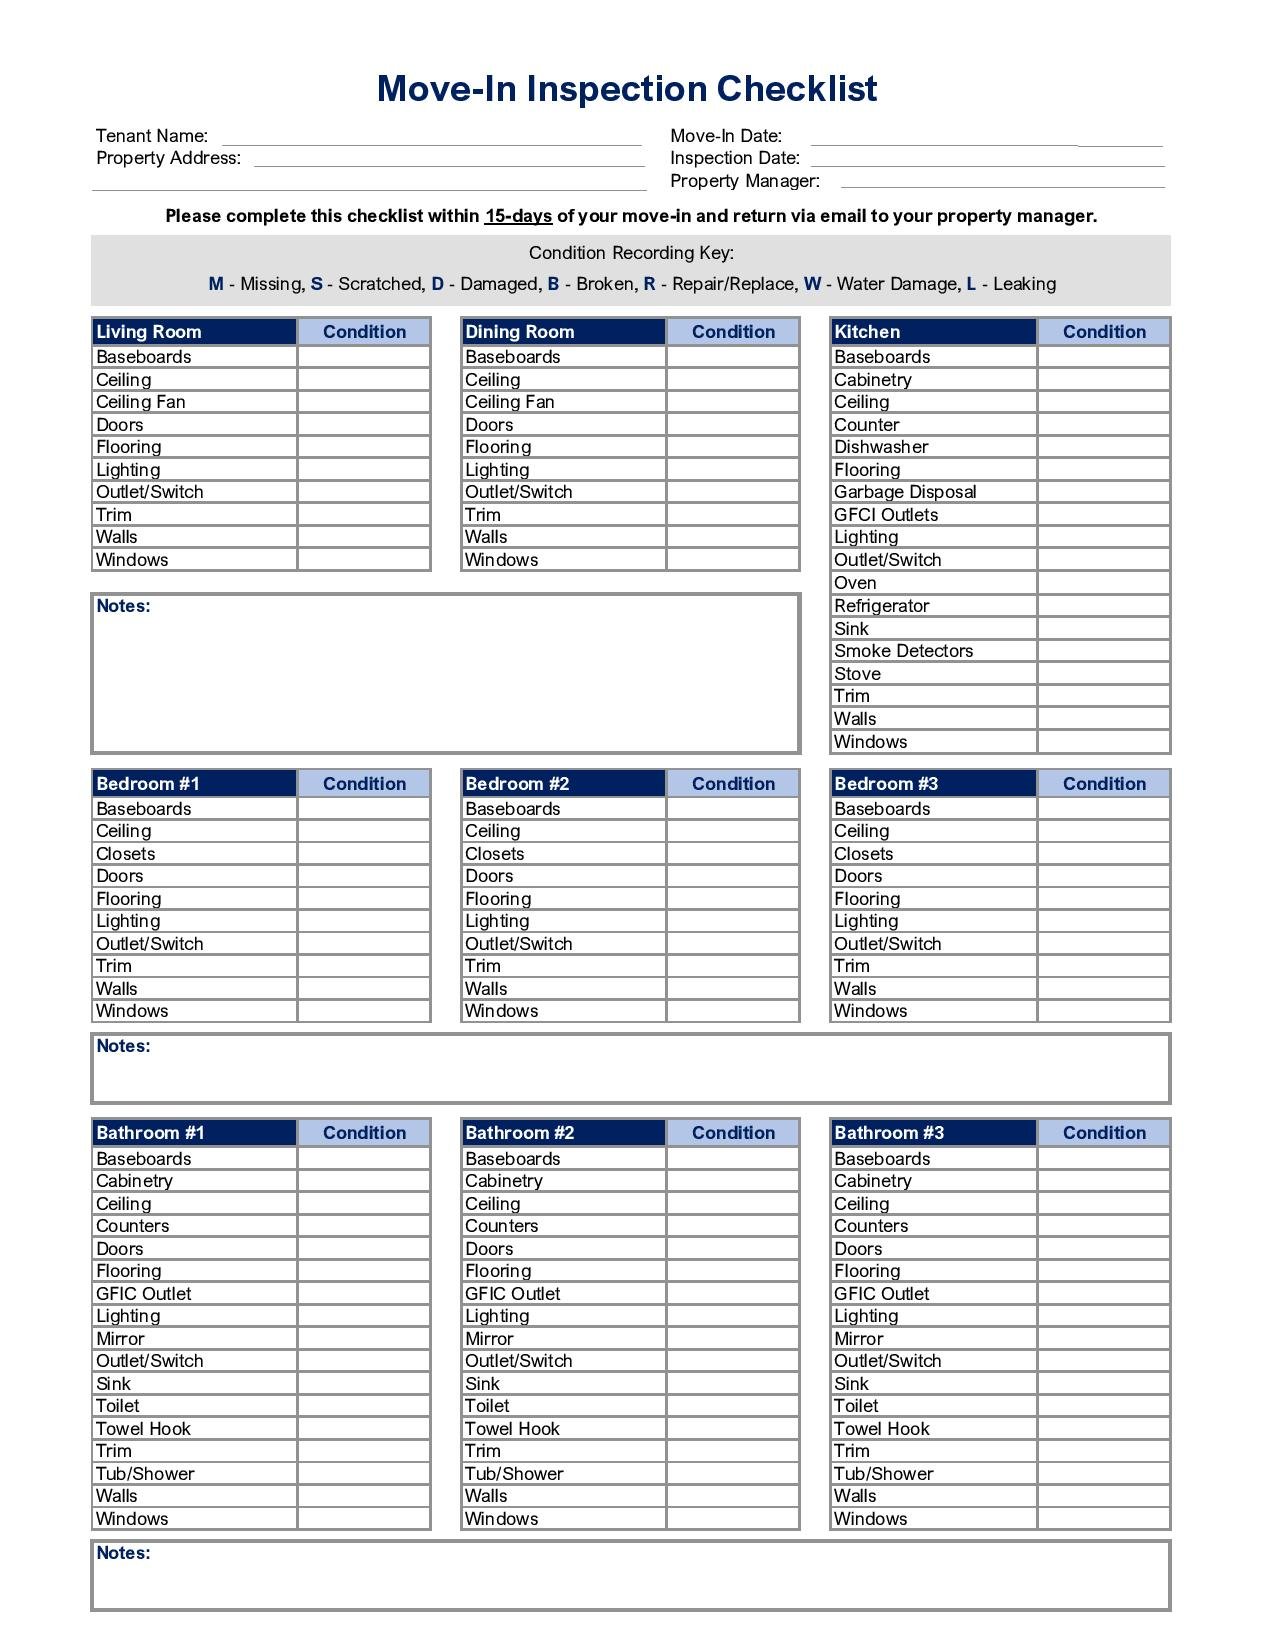
A good move-in inspection checklist needs to detail every room of the home plus the exterior. Space for notes is key to document any locations of existing damage further. Below we list some of the areas to address when completing or creating your move-in inspection checklist.
- Property Exterior
- Interior Systems
- Living Area
- Dining Area
- Kitchen
- Bedrooms
- Bathrooms
- Bonus Rooms
Property Exterior
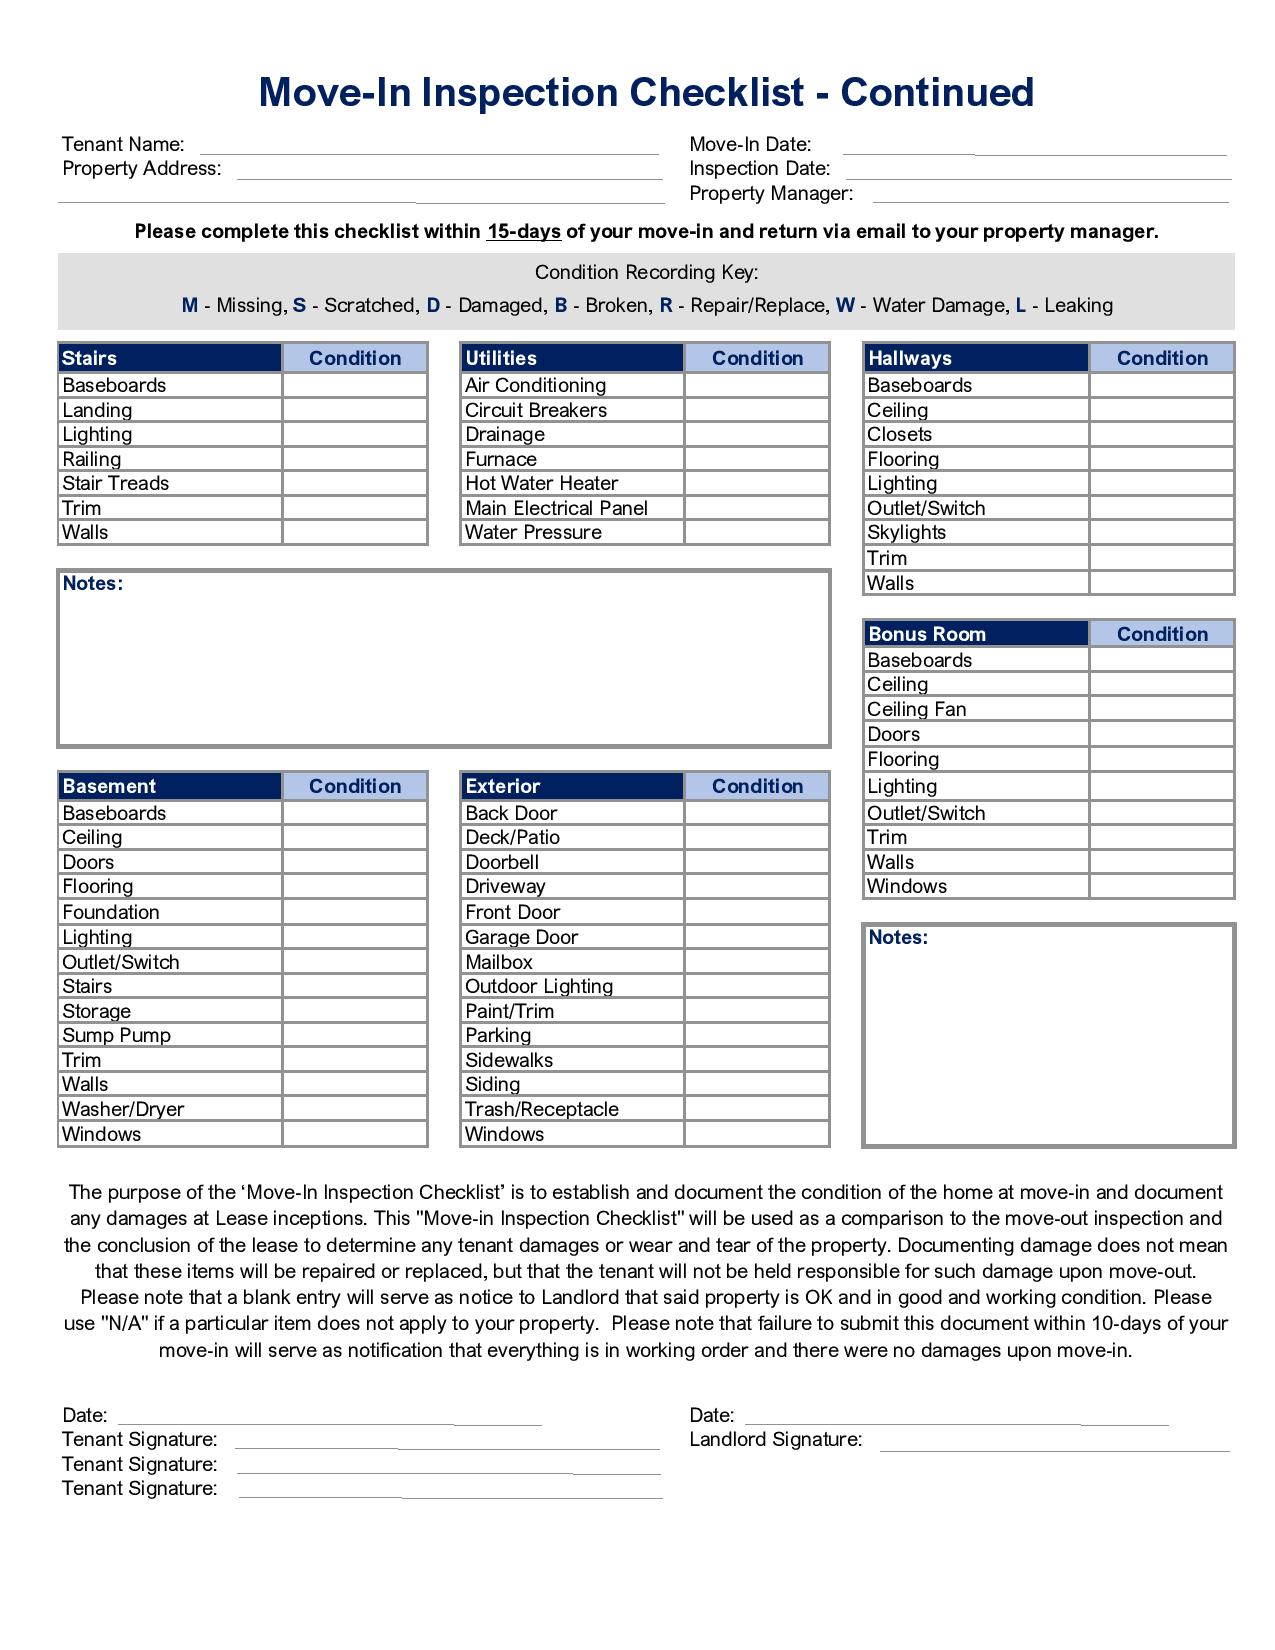
The property exterior is often overlooked but is just as important as the inside. If the rental has a driveway, patio, basement entrance, stairs, pathway, landscaping, or patio – any areas of concern should have a place to be noted. Even something as simple as the doorbell could cause repair bills at the end of the lease.
Interior systems
Interior systems like air HVAC, smoke detectors, plumbing, and electrical systems should be delivered to the tenant in working order. So, ensure that these are present and in working order.
Living Area
The living room gets a lot of use throughout the life of a lease. Therefore, this section needs particular attention to detail. The move-in inspection checklist should include space for documenting flooring, ceiling, walls, baseboard, windows, doors, lighting, and outlet condition. Additionally, leave space for property-specific items such as a fireplace.
Dining Area
A dining area may not apply to every rental home, but you have one, include it on your move-in checklist. Similar to the living area, document the condition of the walls, flooring, ceiling, windows, and doorways.
Kitchen
The kitchen has a lot going on. It is the heart of any home and therefore gets a ton of use. In addition to walls, light fixtures, flooring, and ceilings, create places for kitchen specific items. Include features such as countertops, cabinets, sink, drain, garbage disposal, backsplash, drawers, appliances, outlets, light fixtures, and built-in shelves.
Bedrooms
Each bedroom throughout the home needs to have a separate section. However, make sure there is a way to distinguish which bedroom is which for proper record keeping. Other than that, stick to the basics of floors, walls, windows, doorways, ceiling, ceiling fans, light fixtures, and closets.
Bathrooms
Just like bedrooms, bathrooms each need a dedicated area on the inspection. Along with the basics, be sure to evaluate bathroom specific items such as the tub, vanity, showerhead, faucet, drains, countertops, vanity mirror, and plumbing. If there are any medicine cabinets or shelving units, these should also make the list.
Bonus Rooms
Many rental homes have added rooms such as a den, office, finished basement, play area, or sunroom. So, create space to include all of these items specific to your rental property on the move-in inspection checklist.
Helpful Tip: Looking for a comprehensive move-in inspection checklist? Check out this easily Move-In Checklist.
Conclusion
A move-in inspection is an essential step to the move-in process. Without it, landlords will have difficulty evaluating what tenant damage is and what was previously there. Don’t find yourself stuck with repair bills or disputes at lease end. Instead, reach out to the area’s leading property management company in Delaware County and throughout Pennsylvania. Bay Property Management Group will take the guesswork out of inspections, the leasing process, and day to day rental management. Call us today to see how our staff can make your rental property investment a stress free experience.
